Ever had a photo that you really needed… but the quality was just terrible?
Blurry, pixelated, and the moment you zoom in everything falls apart.
This happens to almost everyone.
Images downloaded from WhatsApp, old photos from your gallery, or pictures from the internet, most of them lose quality at some point.
I ran into the same problem recently. I needed an image urgently, but the quality was so low that it was almost unusable. I tried a few tools, but some added watermarks, some asked for payment, and a few didn’t really improve the image at all.
Then I tried Google Gemini… and honestly, the result was better than I expected.
No extra software, no complicated settings just a simple prompt, and the image improved quite a bit.
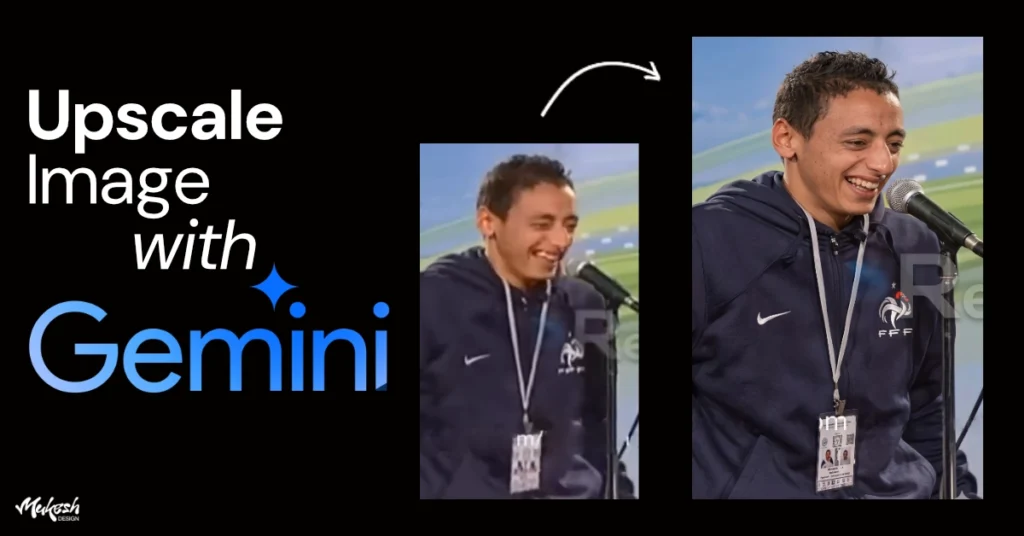
In this blog, I’ll show you the exact method I used to upscale low-quality images in Google Gemini, along with real examples so you can try it yourself for free.
Can Google Gemini Really Upscale Images?
Most people still think Google Gemini is just for writing or answering questions, but its image model, Nano Banana, has improved a lot recently.
When I tested it, I noticed that it can clean up blur, improve edges, and even make some text more readable. It’s not perfect, but for a free tool, it’s definitely useful especially when you just need a quick fix.
The best part? You don’t have to install anything or sign up for some random tool.
I Tested This Prompt on Different Types of Images — Here’s What Happened
Before sharing the exact prompt, I wanted to see how well Google Gemini actually performs in real-life situations. So instead of testing just one image, I tried it on different types of low-quality images the kind most people usually have.
Some were blurry photos, some had unclear text, and a few were compressed images downloaded from the internet. The goal was simple: to check whether Gemini can actually improve these images in a practical way, not just in perfect conditions.


The Prompt I Used (Works Really Well)
Here’s the exact prompt I tested multiple times:
Ultra-high-resolution 4K upscale of the provided image with strict identity preservation.
The subject’s face must remain exactly the same, including facial structure, proportions, skin tone, and all unique features. Do not alter, enhance, or reinterpret the face in any way.
Enhance fine details such as skin texture, hair strands, fabric weave, and edges using advanced AI super-resolution, while keeping all original features intact.
Maintain original lighting, color balance, and natural shadows. Remove compression artifacts and pixelation without introducing new details that were not present in the original image.
No face enhancement, no beautification, no symmetry correction, no stylization, and no distortion.
Preserve original expression, pose, framing, and camera perspective exactly as-is. Keep the original aspect ratio unchanged.
Output in 4K resolution with photorealistic, studio-grade clarity.
You can copy this as it is. If needed, you can slightly tweak it depending on your image, but this version works well in most cases.
How to Upscale an Image in Gemini (Step-by-Step)
The process is honestly very simple. You just open Google Gemini in your browser, upload your image, paste the prompt, and hit enter.
Within a few seconds, Gemini gives you an enhanced version of your image. No complicated settings, no sliders, nothing confusing. It feels more like chatting than editing — which is actually nice.
My Real Experience After Testing
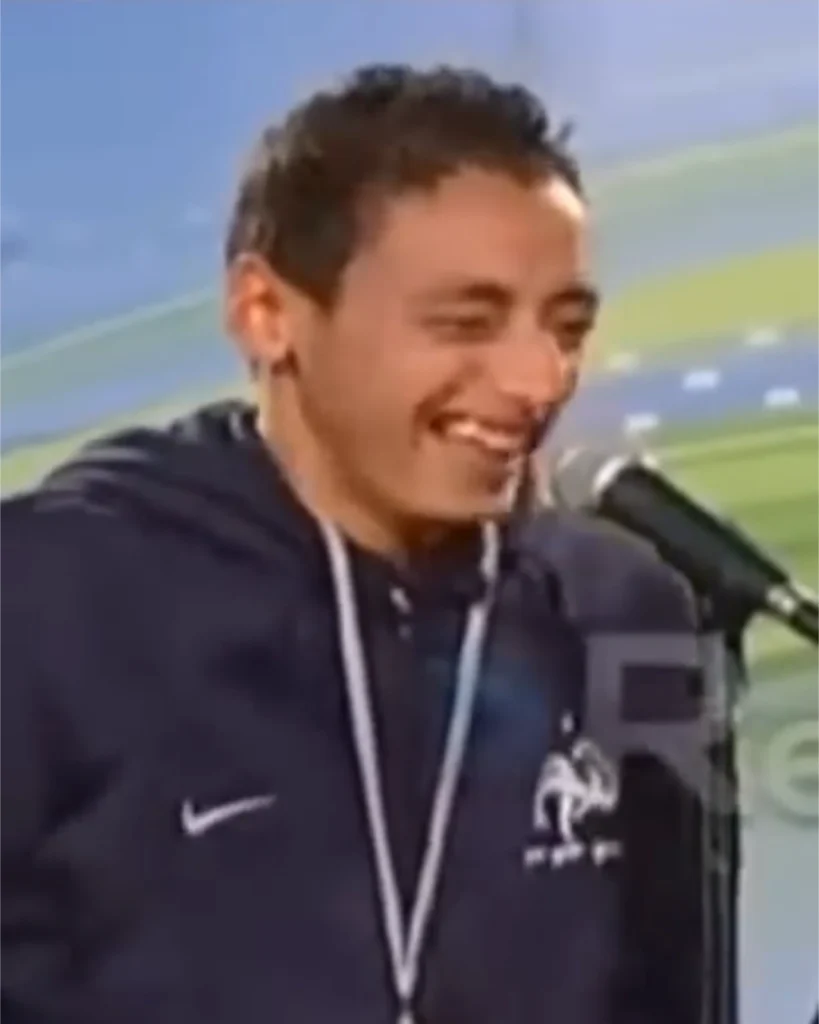
I didn’t just try this once. I tested it on a few different types of images to see how consistent it is.
For slightly blurry images, the results were pretty solid. Edges became sharper, colors looked cleaner, and overall the image felt more usable. In one case, even the text that was hard to read became clearer, which honestly saved me some time.
But when I pushed it further with very low-quality or heavily compressed images, the limitations started to show. Tiny text still struggled, and sometimes the output looked a bit over-smoothed. It’s not something I’d rely on for high-end or print work.
So yeah, it works — but within limits.
When This Trick Actually Makes Sense
If you’re working on quick social media creatives, thumbnails, or basic design fixes, this method is honestly very helpful. It’s fast, free, and doesn’t require switching between tools.
But if you’re dealing with client work that needs perfect detail, or something going for print, you’ll probably still need Photoshop or a dedicated upscaler.
Think of Gemini as a quick fixer, not a final polishing tool.
Final Thoughts
Honestly, I didn’t expect Google Gemini to be useful for image upscaling but it turned out to be a handy little trick.
It’s not the most powerful tool out there, and it won’t replace professional software. But for something that’s completely free and takes just a few seconds, it’s definitely worth trying.
If you’re a designer or someone who deals with images regularly, this can save you in those annoying situations where you only have a low-quality file and no backup.